How to Authenticate and Authorize an Account with OAuth 2.0 from Google Sheets


Photo by Matthew Henry on Unsplash
Google Sheets is a tremendous tool in its own right but combined with Google Apps Script, it can become a powerful hosted database with minimal upfront development. But databases are only as good as their ability to integrate with services and applications. Manually exporting and importing data is not scalable and is very time-consuming. The ability to easily integrate Google Sheets with outside components opens up infinite possibilities, and I’m going to show you how to do it with the Constant Contact APIs.
Constant Contact is an online marketing company that helps your business easily manage marketing campaigns. One of its most useful and popular services allows you to manage email campaigns to your database of contacts. For small businesses without a ton of development resources, using Google Sheets can be an attractive, low-cost solution to persisting your contacts, marketing materials, and all other relevant information.
Before we dive into the technical details of authenticating and authorizing your Constant Contact account from within Google Sheets, we need to discuss OAuth.
OAuth
OAuth, or Open Authorization, is a leading open standard for delegating secure access. Many large companies use the standard to allow users to give third-party applications access to their information without actually having to give the third party their password. Having a secure way to delegate access is critical for any platform or ecosystem.
OAuth is complicated. At a high level, OAuth describes a standardized way for a user to authorize a third-party application API access. Let’s take a look at the workflow for OAuth 1.0:
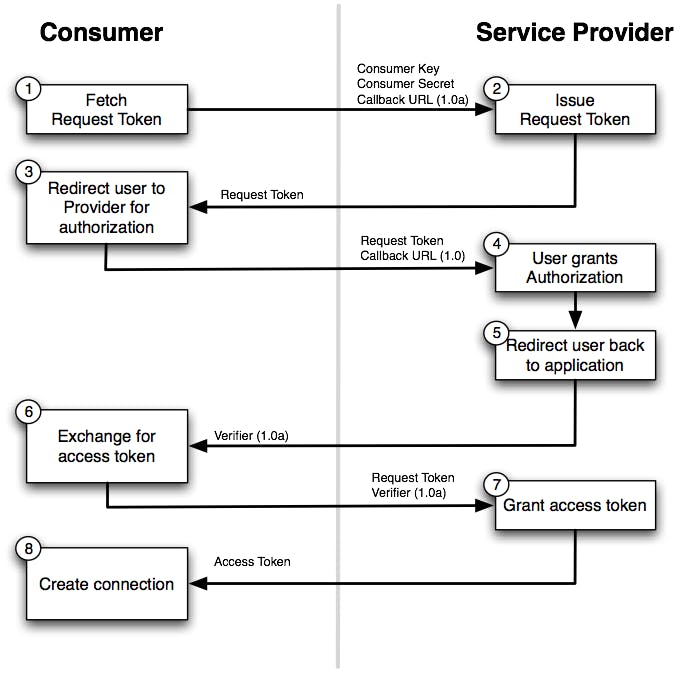
A flow diagram for OAuth 1.0 (Source)
As you can see above, first the user needs to request a Request Token by providing a key and secret. Then the user is redirected to authenticate themselves. Afterward, the user can request an Access Token which will be used in subsequent requests for authorized data.
The architects of OAuth looked to improve on this workflow with the introduction of OAuth 2.0. Whether or not they succeeded in their goal is debatable, nonetheless, it proliferated across the tech landscape and developers need to understand it. Let’s take a look at the updated flow diagram:
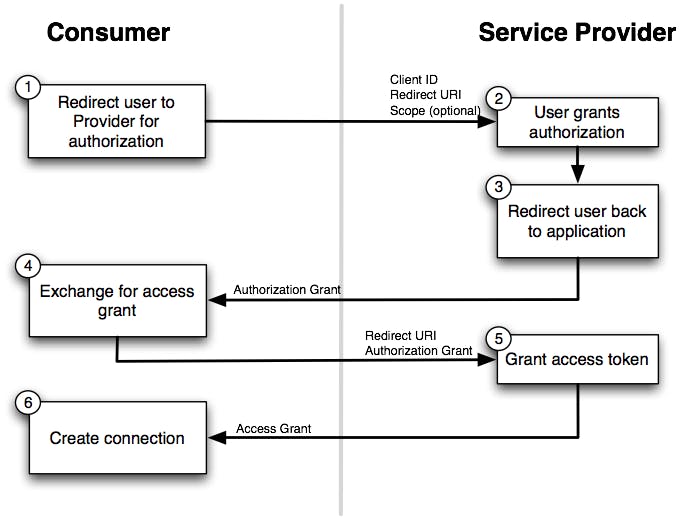
A flow diagram for OAuth 2.0 (Source)
OAuth 2.0 has a very similar workflow as OAuth 1.0, but as you can see above, it has streamlined things a bit. With the removal of the Request Token workflow, OAuth 2.0 has reduced some of the network calls required in the so-called “OAuth Dance”.
Now that we have a very high-level understanding of what OAuth is and its flavors, let’s dive into the integration.
Constant Contact Integration
To execute any CRUD operations on a Constant Contact account, you’ll need to authenticate and authorize your application (i.e. Google Apps Script). Constant Contact’s V3 API documentation is pretty good. They have useful step-by-step instructions and an impressive API reference that allows you to see example requests and test out the actual APIs right there in the browser.
After setting up your application settings in Constant Contact, you’ll notice that you need to choose an authorization workflow. They offer a three-legged “Server Flow” and a two-legged “Client Flow”, and I’ve chosen the Server Flow because it supports refresh tokens.
I then started down the Server Flow path and began creating generic request functions that wrapped around Google App Script’s UrlFetchApp class, but then I realized that authenticating in Google App Script is likely a common task that someone has probably already open-sourced. Sure enough, the good people at googleworkspace on GitHub created an OAuth 2.0 utility class that can be used for just this purpose. It wraps on top of the same UrlFetchApp class I mentioned before, conveniently extracts and handles the authorization code for you, and persists the authorization token in the property store of your choosing.
Once I vetted the OAuth 2.0 utility class and read through the documentation, building out the authentication and authorization was a breeze. Let’s take a look at some code.
First, let’s set up our OAuth 2.0 service using the OAuth 2.0 utility class discussed above:
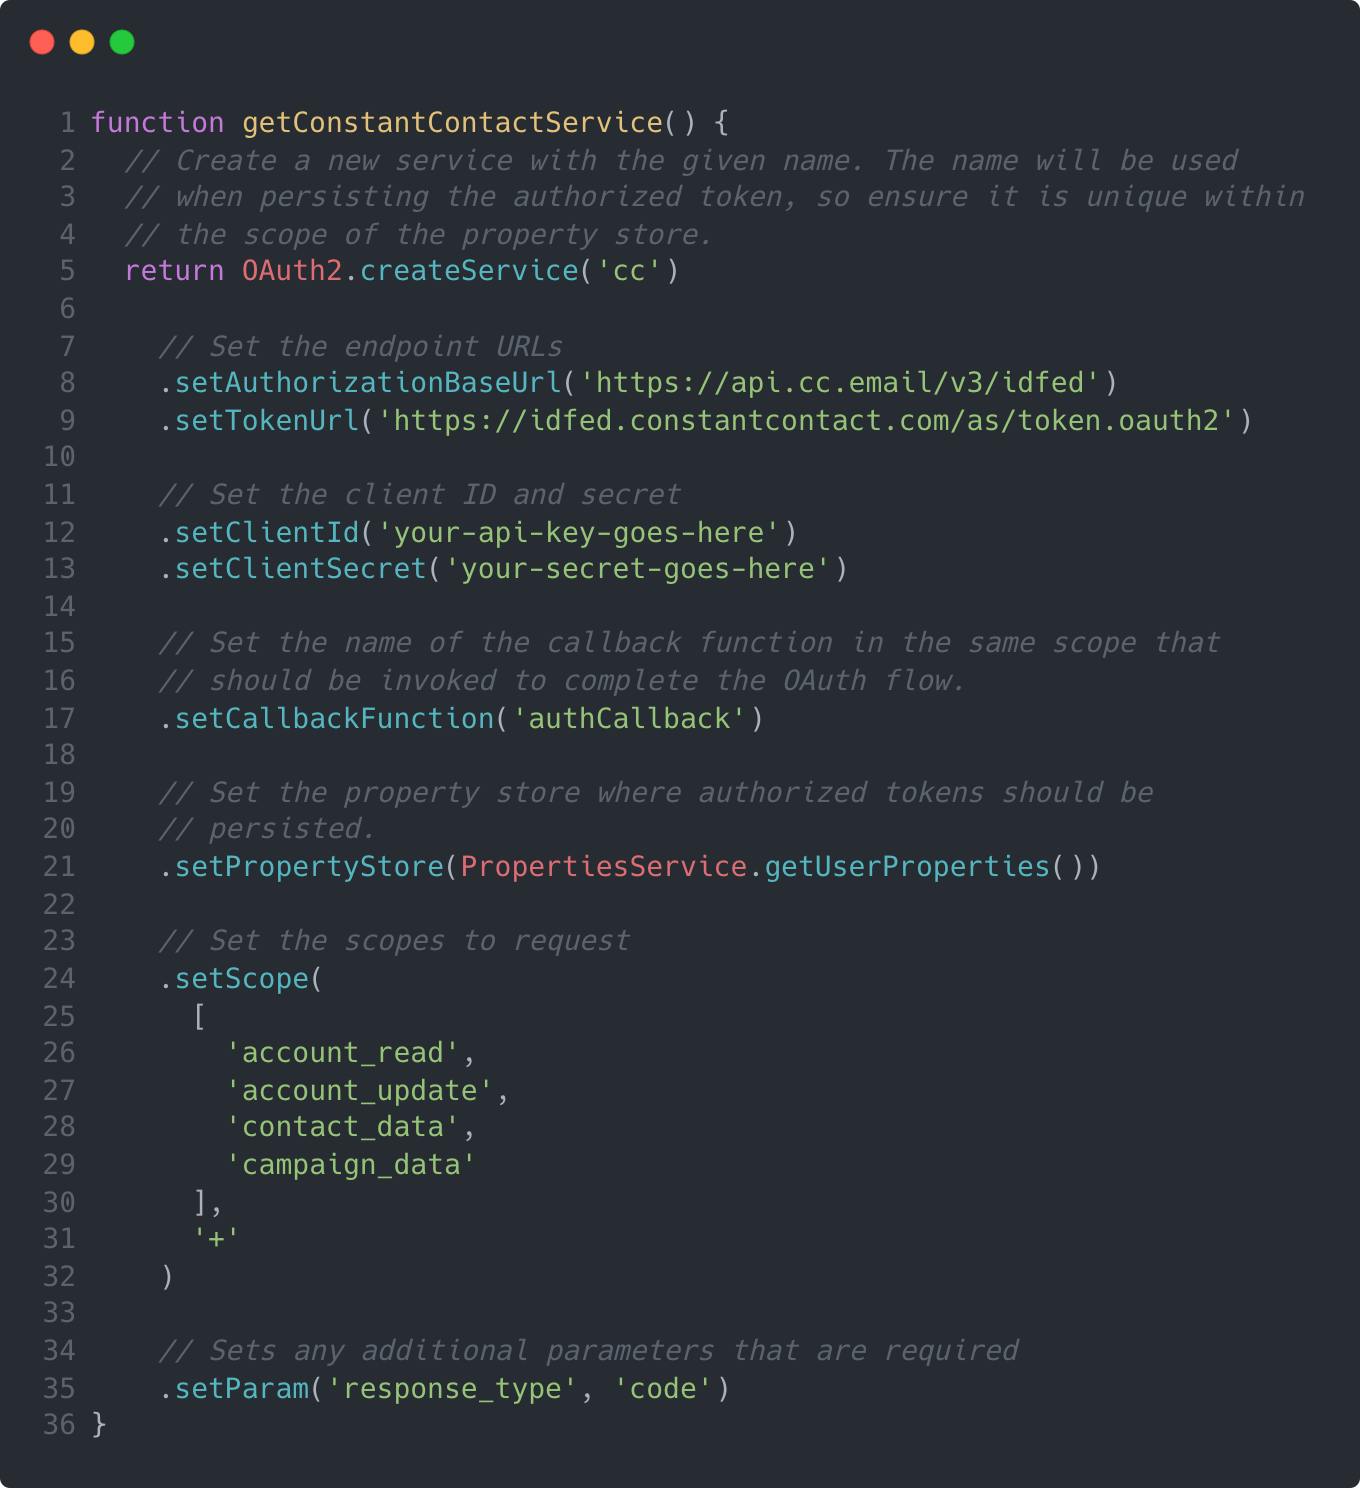
Sample JavaScript code to instantiate the OAuth 2.0 service.
The OAuth 2.0 utility class we’ve consumed above is designed to be chained (i.e. each method returns this). Let’s take a look at each method that was invoked here:
createService
This is the general entry point for this whole operation. This method creates a new instance of the privateService_class.setAuthorizationBaseUrl
This sets the URL for the first leg of the authentication and authorization process.setTokenUrl
This method sets the URL for the request to fetch the authentication token.setClientId
Here, we use this method to add our API key to our initial request (i.e. first leg). This key should be provided by the third-party service you’re trying to authenticate.setClientSecret
Similarly tosetClientId, we use this method to set our API secret for the first leg. This value will also be provided by the third-party service you’re trying to authenticate.setCallbackFunction
This sets the name of the function that should be invoked when the OAuth process has been completed. The parameter to this method is aString, not a reference to a function.setPropertyStore
This method sets the property store where authorization tokens will be persisted. I highly recommend using the native Google Apps ScriptPropertiesServiceshown above because it already conforms to the interface expected bysetPropertyStore.setScope
During the authorization step of OAuth, you’ll need to describe which scopes you need to be authorized for. The parameter to this method is anArrayof scope nameStrings.setParam
This method is a generic method to add any additional parameters you may need during the OAuth process. In my example above, Constant Contact requires you to describe theresponse_type. You may chain on as manysetParamcalls as you need.
Now, let’s take a look at the UI portion of the authorization. OAuth 2.0 requires the user to be navigated away to the authorizing entity to properly authenticate and authorize. There are a few ways to prompt the user to navigate, and I chose to use the sidebar similarly to the OAuth 2.0 utility class creators described in their README.md example. Let’s see how that looks:
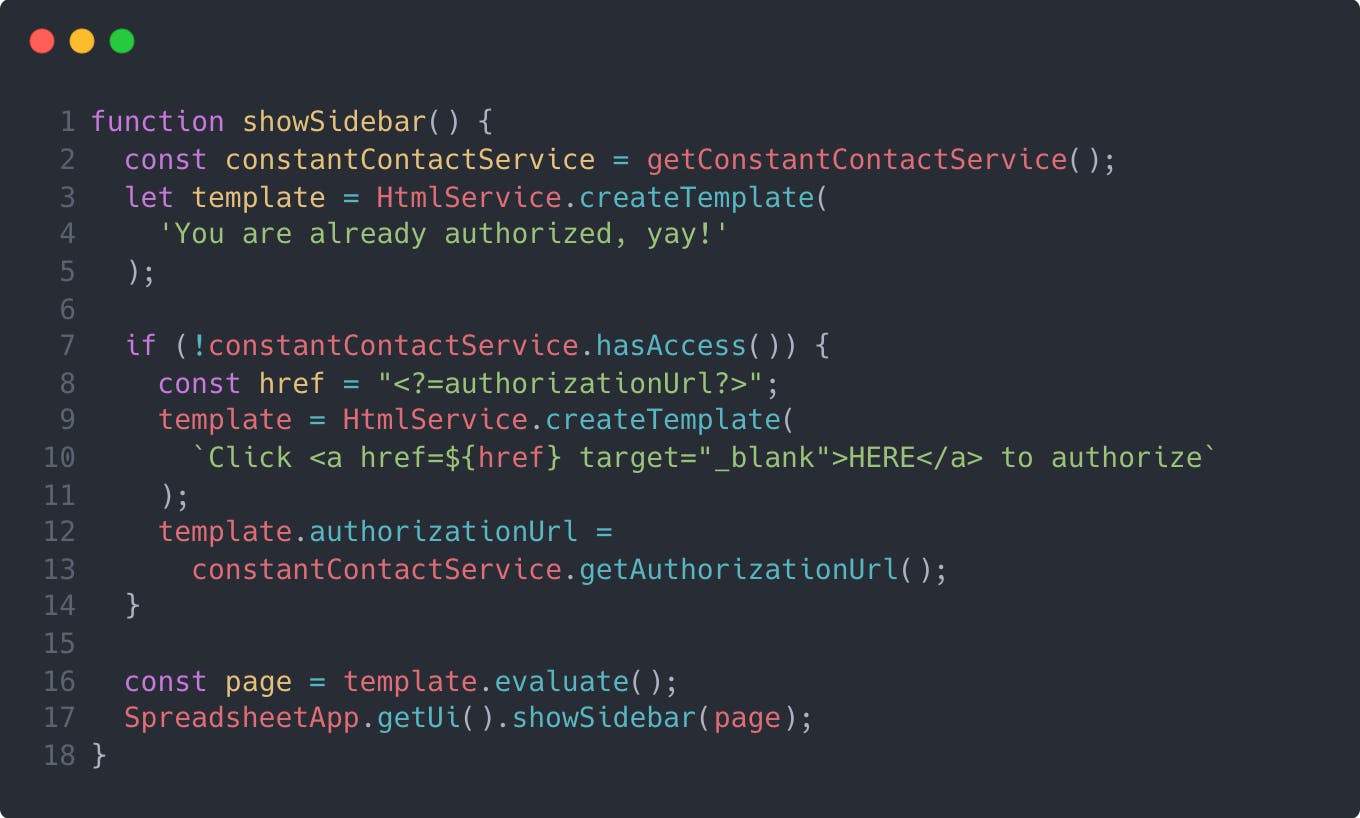 Sample JavaScript code to show a sidebar in Google Sheets with an authorization link.
This function simply renders a sidebar with different content. If the user is not yet authenticated and authorized, the sidebar will render some instructional text with a clickable link that redirects the user to Constant Contact for authentication. The sidebar looks something like this:
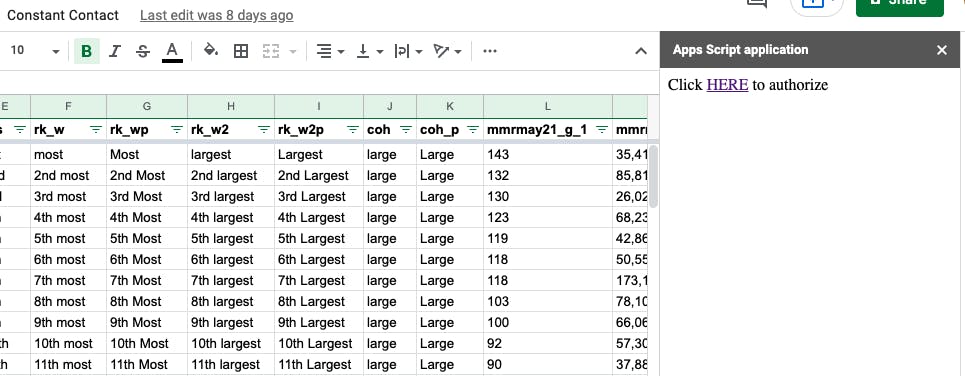 Sample sidebar output of an unauthorized user.
After the user is redirected to the authorization page and properly logs in to authenticate, the user will see a page that looks something like this:
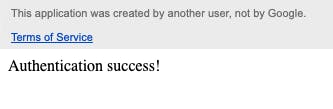 Sample post-OAuth flow HTML rendering.
This shows up because the callback function that we passed into our OAuth service instantiation (i.e. setCallbackFunction(‘authCallback’)) conditionally renders HTML output depending on authorization status. You can see this here:
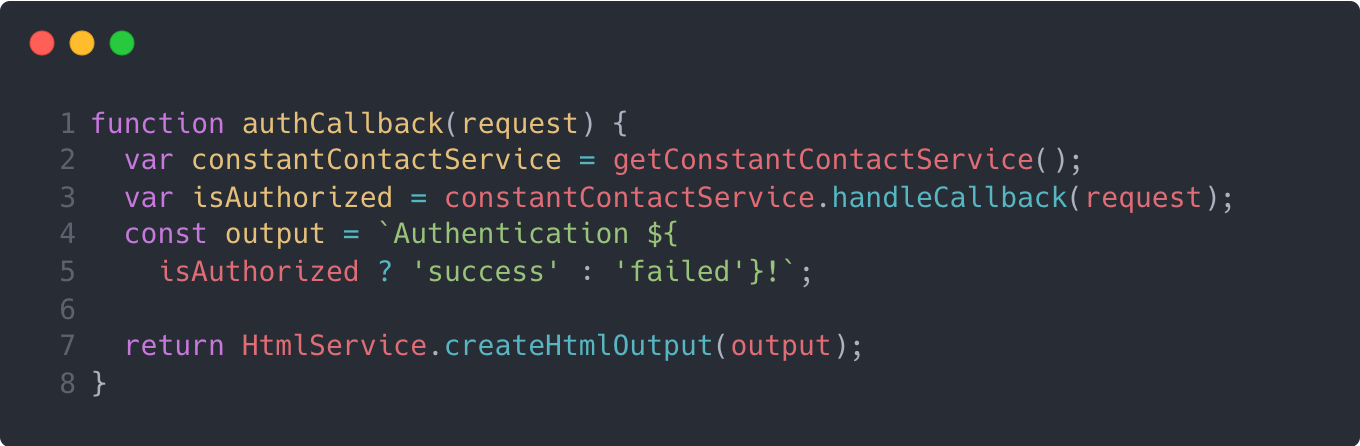 Sample JavaScript code to conditionally render HTML output based on authorization status.
Now, we can simply invoke the getAccessToken method from our OAuth service instance and pass that along in a request header. The example below shows a function that I tested out to create a new “List” in Constant Contact from Google Apps Script.
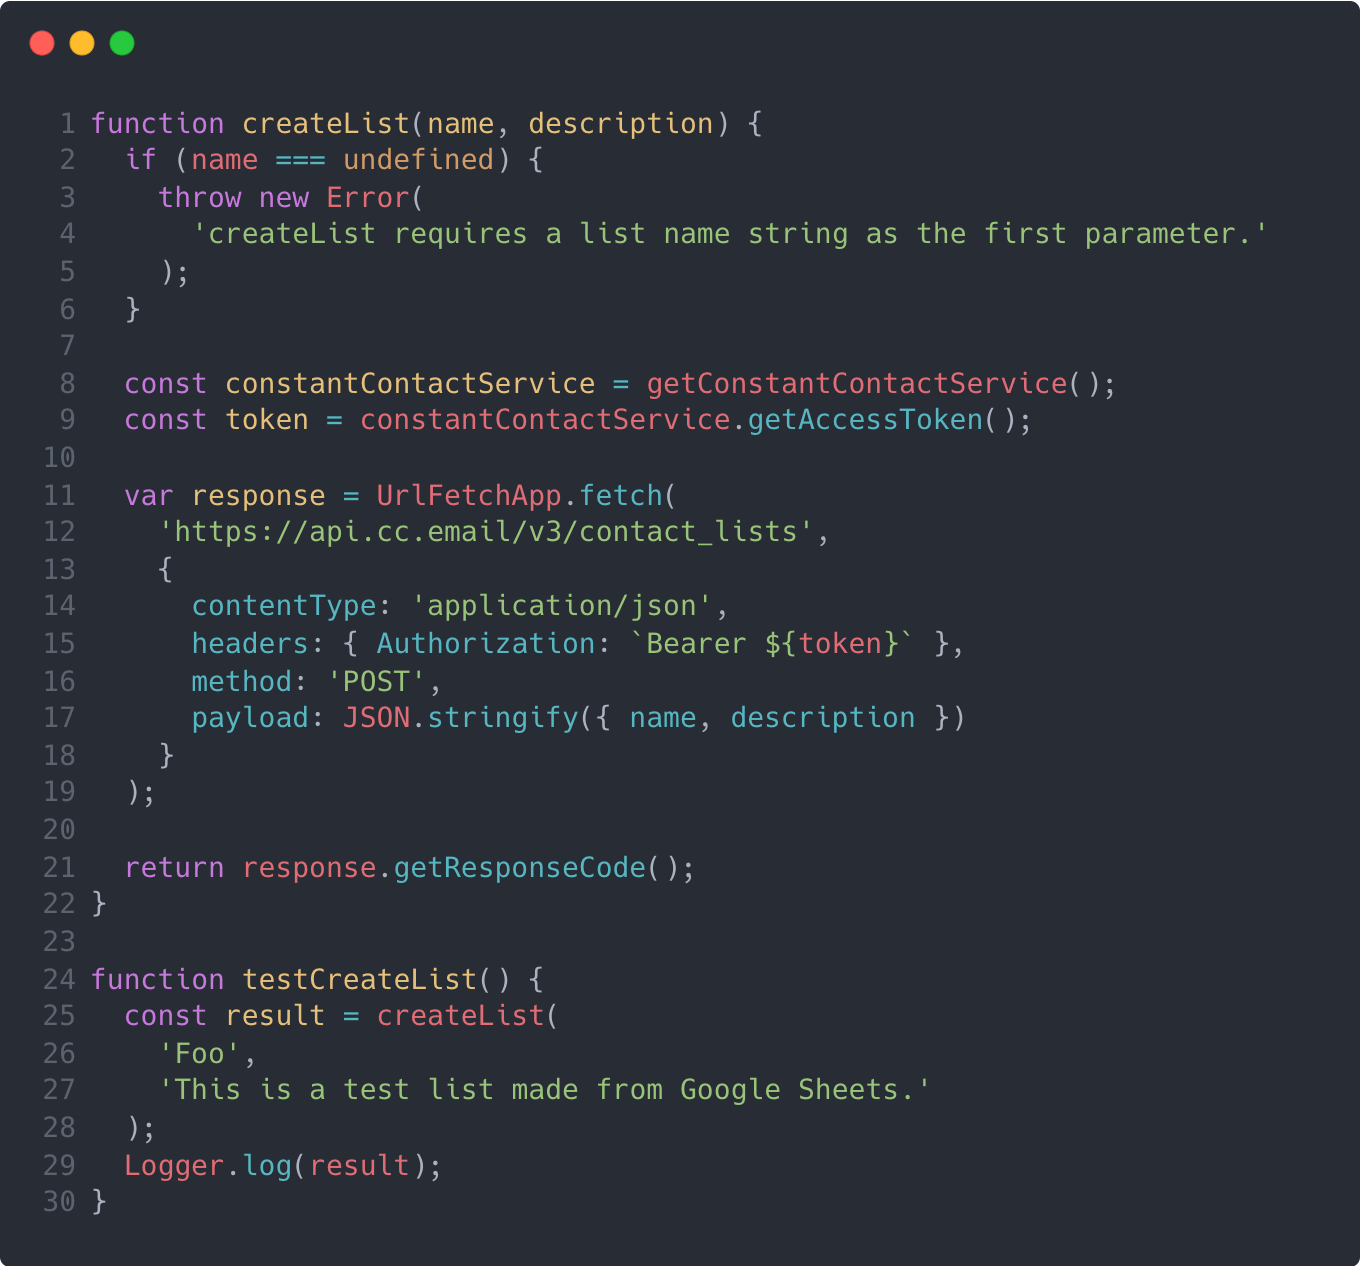 Sample JavaScript code to create a Constant Contact list from within Google Apps Script.
Conclusion
That’s it! Now that you’ve seen how to properly authenticate and authorize from within Google Apps Script, the world is at your disposal. With very little development and essentially zero environment configuration, you can utilize data from your Google Sheets and programmatically interface with external services and data.
This is a game-changer for us, but please let me know in the comments about the creative ways you were able to utilize this tutorial!